Pilates
After any kind of major surgery, most people seek some kind of gentle exercise that will help restore posture, balance and the ability to carry out everyday tasks. After pouch surgery, it is particularly important to strengthen the body’s core muscles, as this not only supports general fitness but also improves pouch function. Following the 2015 Information Day, several people asked for advice on posture for sitting and standing. Several members of the Kangaroo Club practise Pilates. What follows is a very personal account, written and photographed by Laura Dunn, Kangaroo Club Chairman, who has found these exercises tremendously useful.
Pilates is named after Josepth Hubertus Pilates (1883-1967), a German-born fitness instructor, who made his name in New York. He was convinced that his system of ‘Contrology’ could cure all possible ills of mind, body and spirit. I don’t know about that – but I personally have been going to a weekly class for about fifteen years and have always found it to be one of the most important things I can do to keep well. I should emphasise straight away that there are many different ‘schools’ of Pilates out there and it is always recommended that you follow a course led by a qualified practitioner. See, for instance, www.bodycontrolpilates.com
As a starting point, however, I have put together a list of simple exercises which I have found to be particularly beneficial. Take all exercise at your own pace: do no more repetitions than you feel entirely comfortable with.
The single most important thing I think we can do is to strengthen the muscles which surround the pouch and particularly the pelvic floor muscles, which, in a sense, hold everything in! It is impossible to illustrate where these are, as they are deep inside, but they are the muscles which click in when we want to prevent ourselves from emptying the bladder, or indeed the pouch! Interestingly, one way of finding them is to suck your thumb: try it!
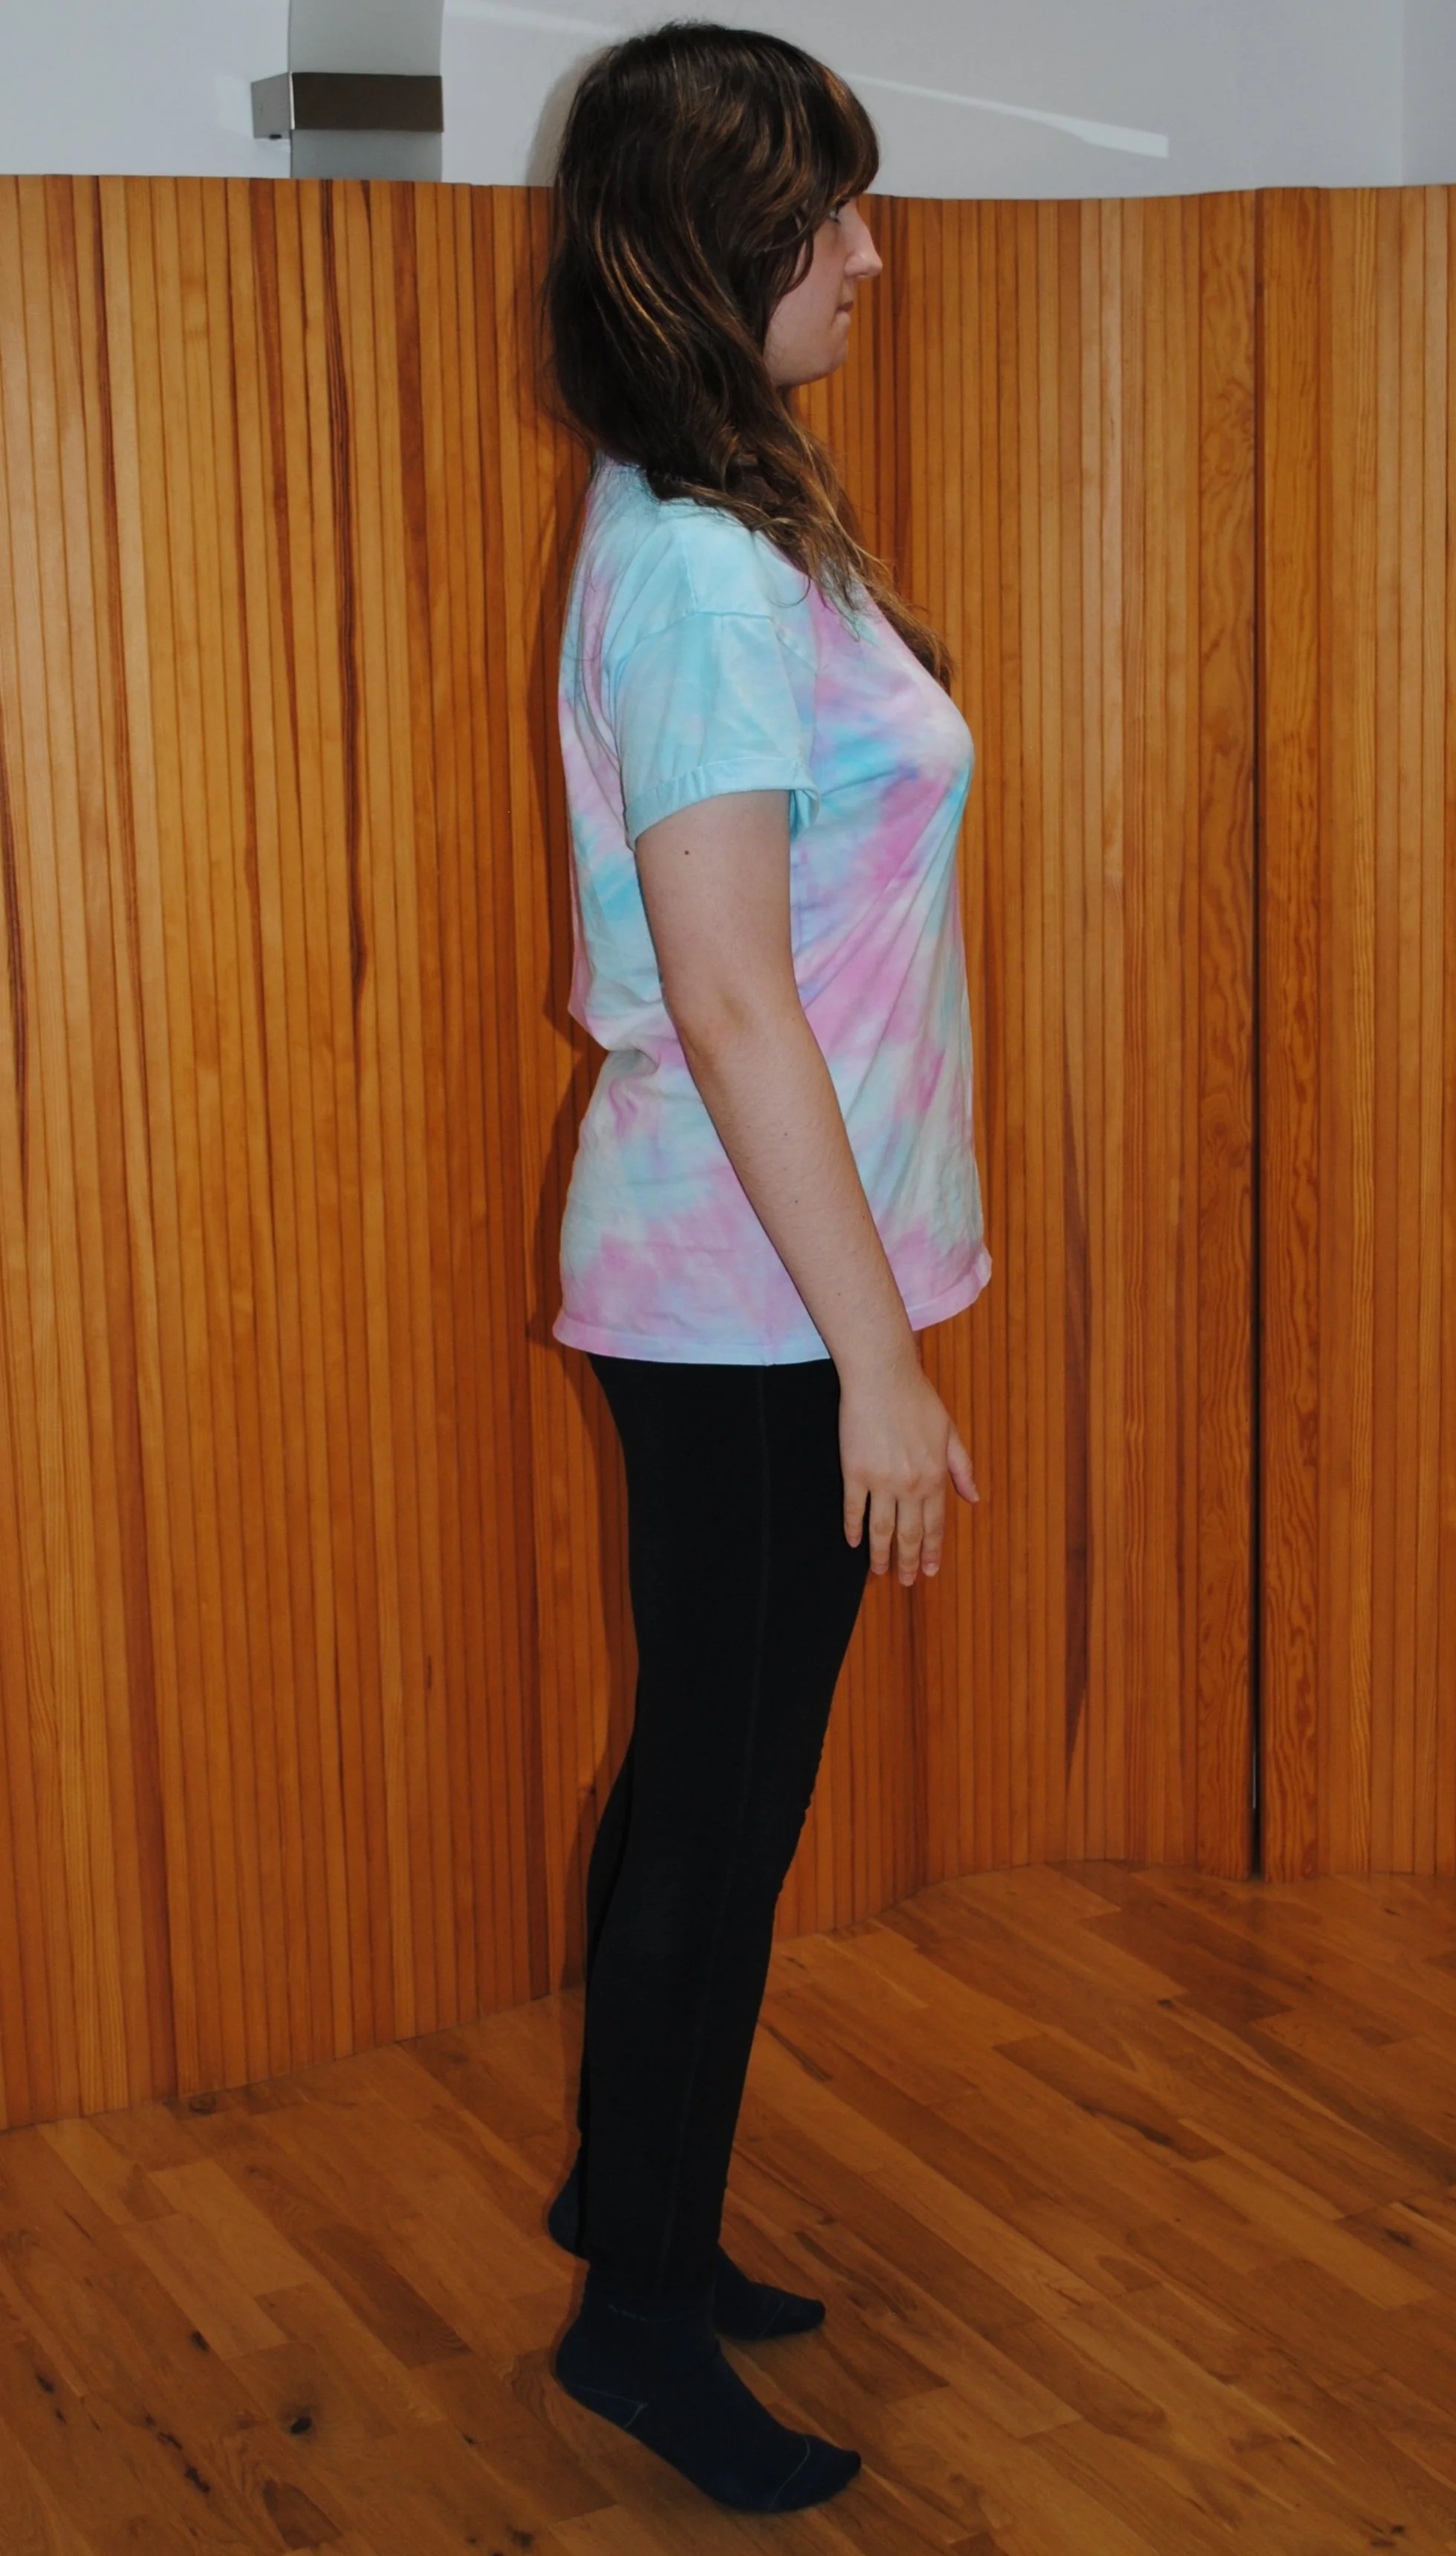
Some Thoughts about Posture

Poor Standing Posture

Good Standing Posture

Good Sitting Posture

Poor Sitting Posture
I think the photographs above speak for themselves. There are many different types of bad posture, both standing and sitting. One way of moving into ‘good’ is to imagine that you have on a very tight zipped jacket. To do it up, you have to hollow your tummy, get hold of the ‘zip’, just below your belly button, and then go on hollowing and scooping, as you pull the ‘zip’ all the way up to chest level. (You have to do this without hunching your shoulders forward, or you won’t be able to move in the jacket! Keep shoulders square but relaxed.)
Pelvic Elevator
Once in a good sitting posture, a good starting point is to locate those pelvic floor muscles, by tensioning them slightly. Imagine that your pelvic floor is like a lift in a building, which can go up inside your abdominal cavity. Gradually put more tension into the pelvic floor muscles, so that the ‘lift’ goes up to the first floor. Then bring it gently down again, before taking it up to the second floor, and so on. As you do this, you will feel more abdominal muscles joining in: this is a good thing and helps to protect the pouch.
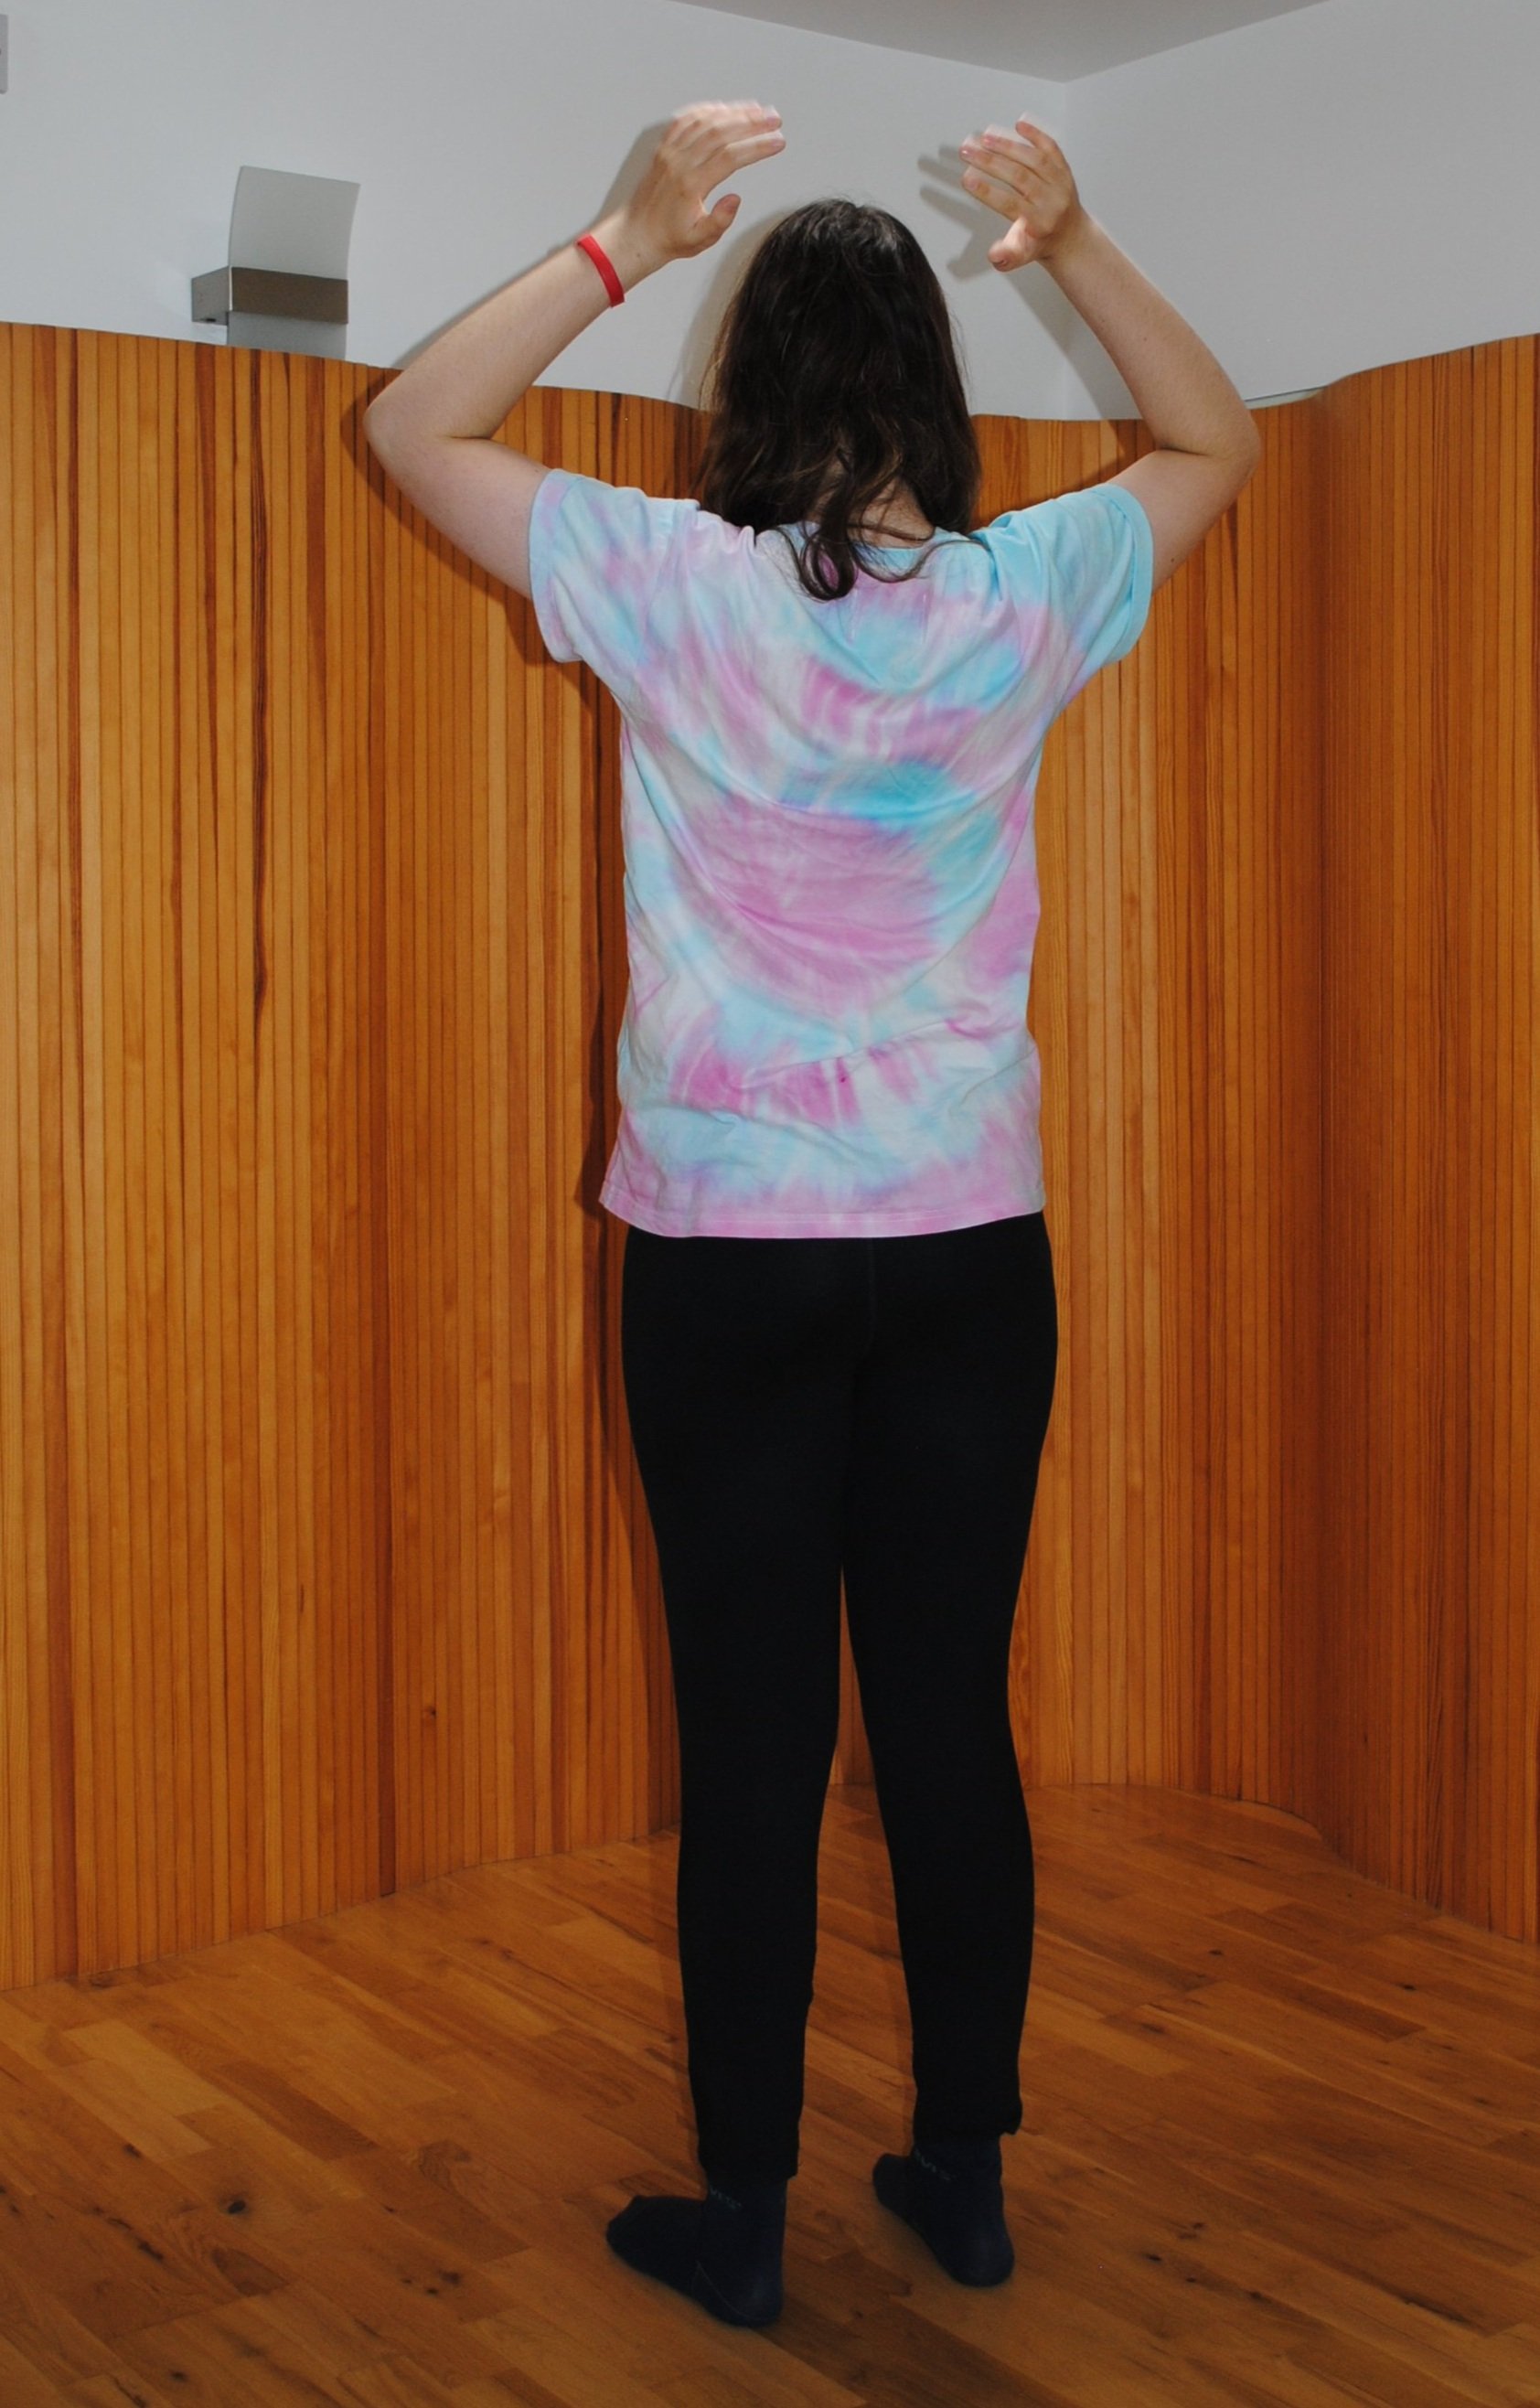
Breathing
You may have found, in attempting the above exercise, that you were holding your breath. It is always tempting to do this when concentrating but it is a bad thing, as we can’t achieve much without oxygen! Try to develop a rhythm of breathing regularly, taking a breath in and then doing a gentle movement on an out-breath. The picture below shows where we want the breath to go, when we breathe in. Most of us ordinarily breathe in and out very shallowly, only using the top part of our lungs. This is particularly the case after abdominal surgery, so we need to try gently to persuade the larger, lower part of our lungs to join in. (This is something that I personally have found very difficult but even small improvements have been enormously beneficial.)

Exercises
The following fifteen exercises are all accessible to beginners and are things that I have found help improve coordination and core stability. Experiment with them, starting with small numbers of repetitions, perhaps five, and concentrating on those which you feel work for you, which is not the same as saying those which feel easiest!

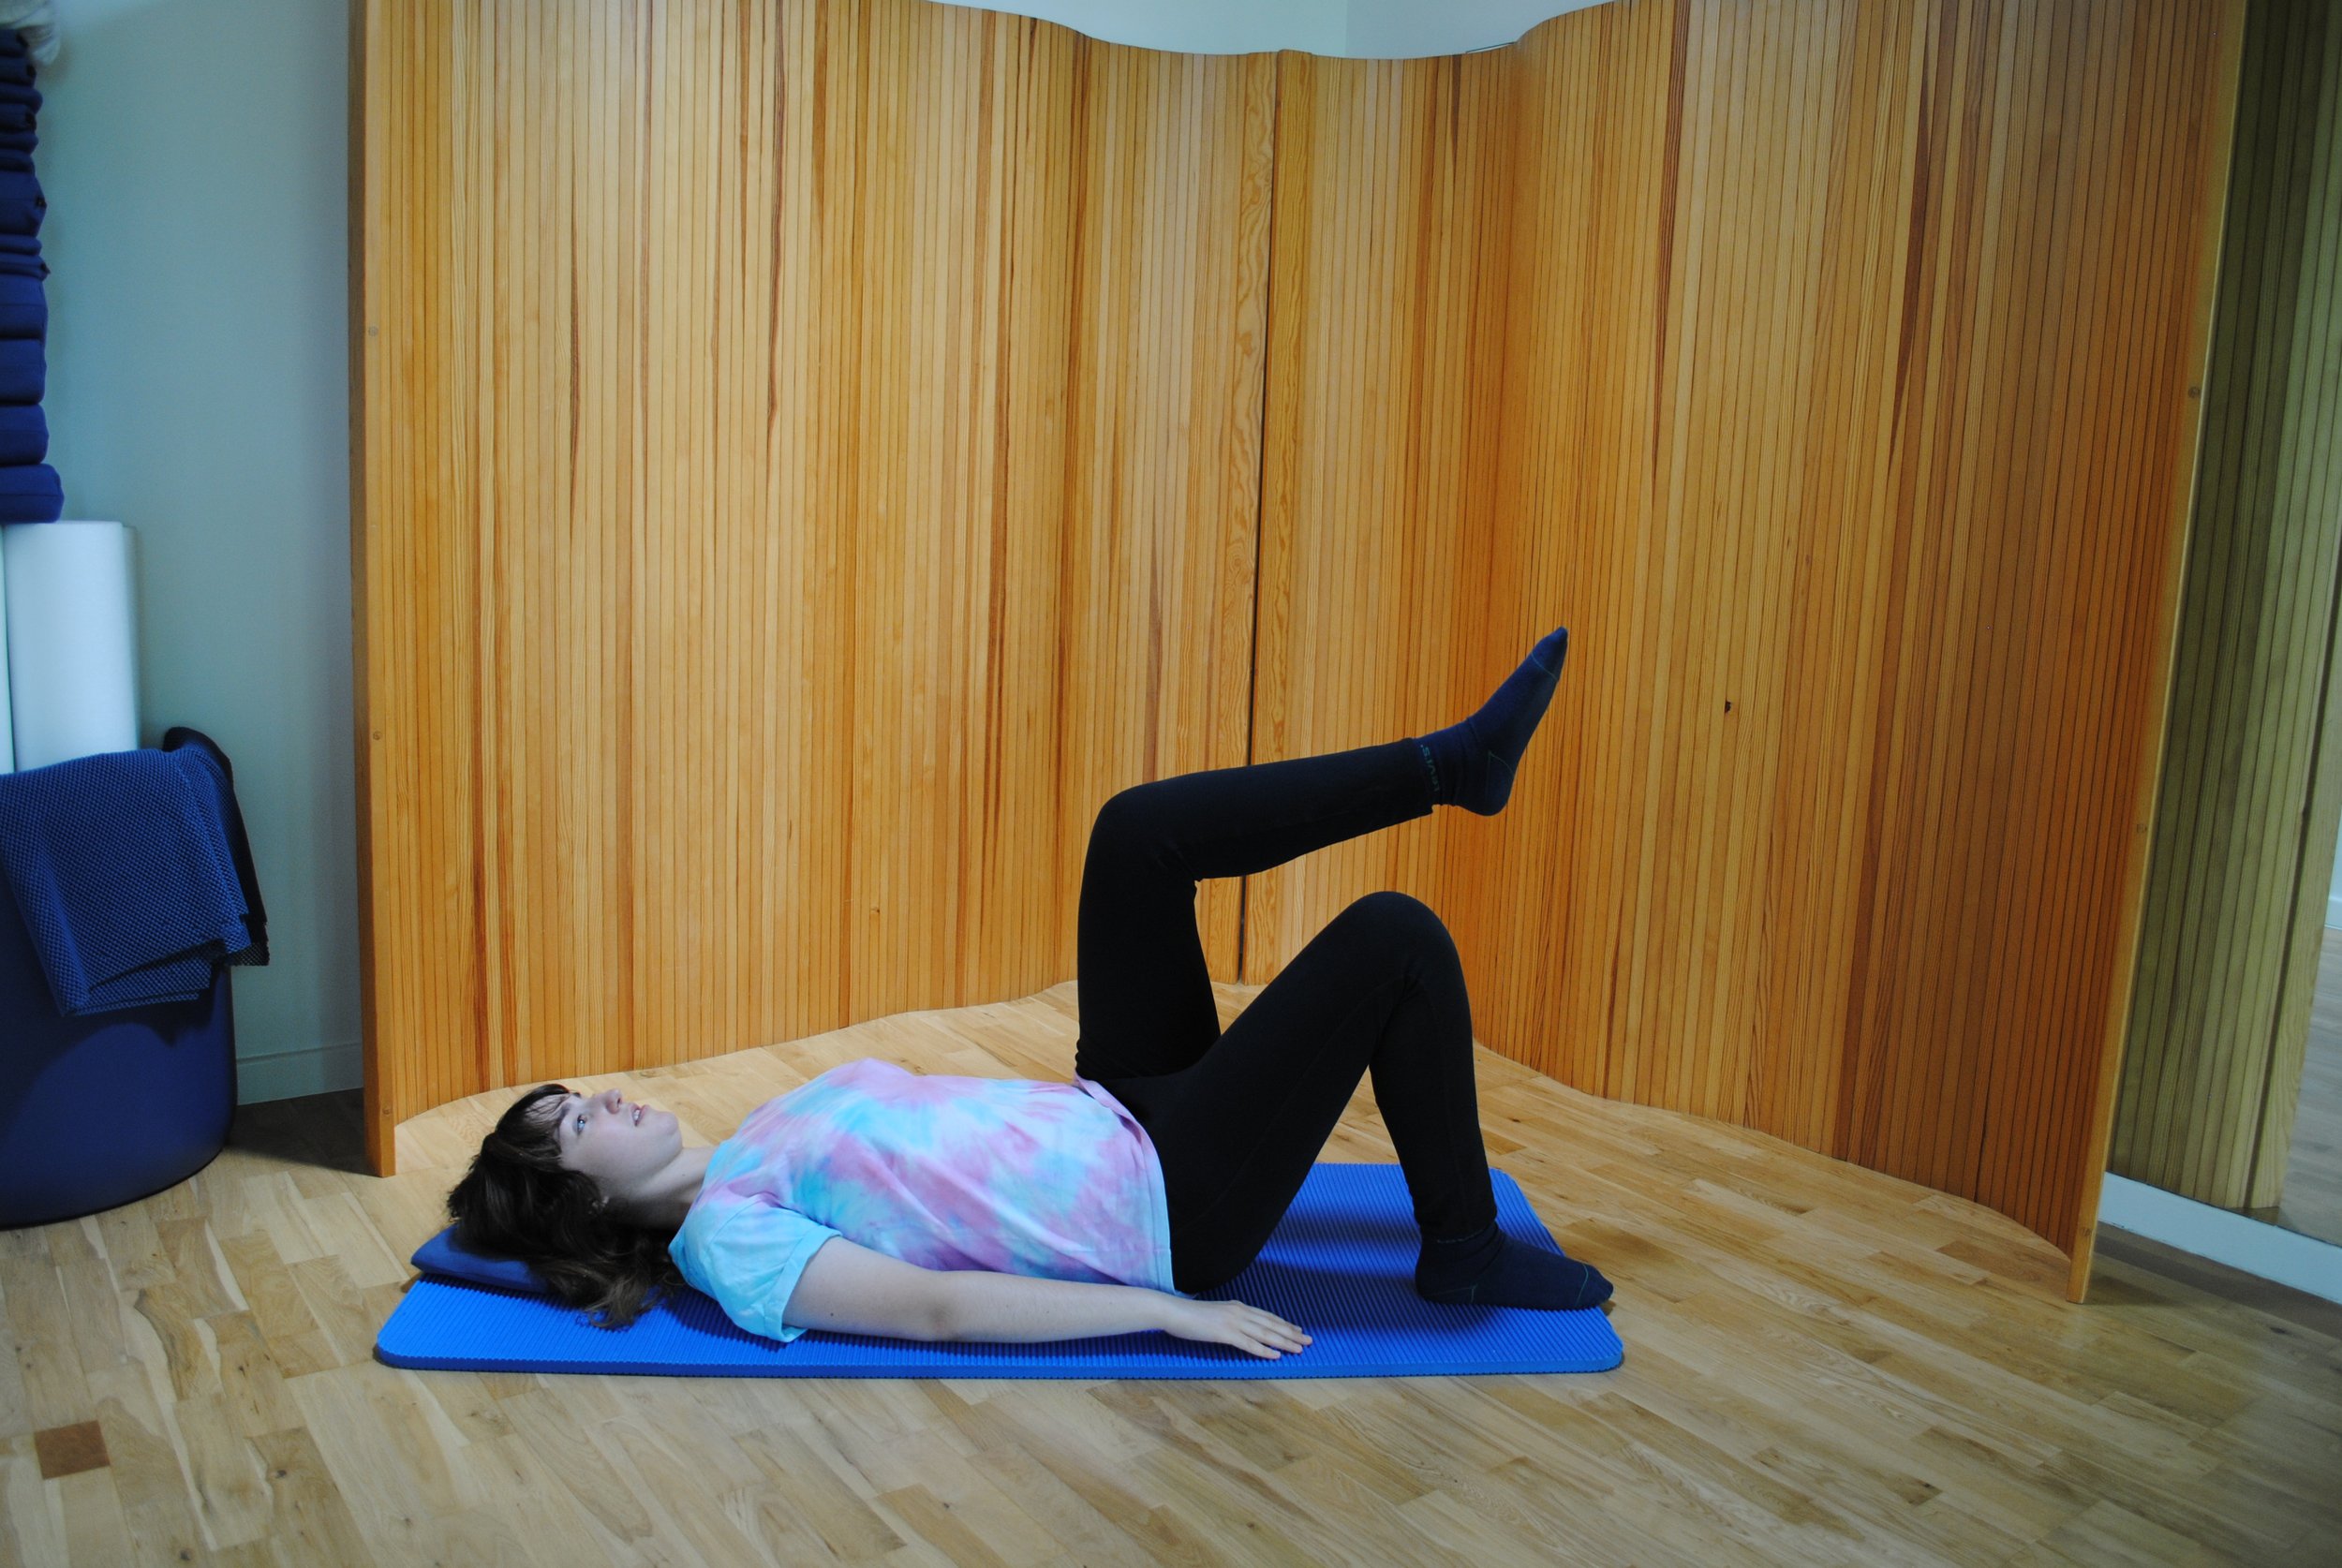
Starfish
Start by lying on your back, with feet hip-width apart on the floor, with knees in line with hips and shoulders. This is called the Relaxation Position. Breathe. Zip up and hollow: remember that ‘jacket’. Slide one leg away along the floor and return, keeping the rest of the body entirely still, with the abdominal muscles just very slightly engaged. Repeat with the other leg. Then, as you slide one leg away, lift the opposite arm above your head, as if swimming back crawl. Return and repeat with the opposite limbs.

Shoulder Drops
From the same starting position as before, raise both arms towards the ceiling, directly above the shoulders, with palms facing inwards. Breathe as far into the lungs as you can. Reach up to the ceiling with one arm, trying to touch it with your fingertips, so that your shoulder blade comes off the floor. Then, as you breathe out, drop the shoulder back on to the floor. Do this with alternate arms. I find this an absolutely brilliant exercise for releasing tight muscles in the shoulders: I often find myself tensing muscles in my shoulders, when what I want to be doing is tensing abdominal muscles, to support the pouch. This helps redress the balance.
Knee Stirs
Again, start in the Relaxation Position. Lift one knee up, so that it is directly above the hip. Gently circle the bent leg, so that it rotates in the hip socket. Keep breathing, zipped and hollowed throughout. The challenge here is to keep the pelvis neutral and stable, not allowing it to rock from side to side, nor forwards and backwards. It helps, I find, to think of keeping the pouch absolutely still, too.

Side Rolls
Start in the Relaxation Position, with feet hip-width apart and in parallel. Breathe, zip and hollow. Gently roll your knees in one direction and your head in the other. Keep both shoulders on the floor: don’t let the knees go so far as to move the opposite shoulder. It’s fine to go a very little distance at first, as you need to be able to use your core muscles to bring your knees back. The point of this is to rotate the spine, while maintaining stability. It also helps work the oblique abdominal (waist) muscles, which are difficult to work but very useful for supporting the pouch and keeping everything in the abdominal cavity in the right place!

Adductor Stretch
The adductors are the muscles of the inner thigh and they connect right up into the lower abdomen. They are muscles that we usually forget about altogether – but I find that working them a little really helps support the pelvic floor and, consequently, the pouch. Start in the Relaxation Position again and breathe, zip and hollow. Lift one leg at a time, place a hand on each knee and allow the knees to fall open slowly. Hold this position for a few seconds, keeping the rest of the body still and, particularly, making sure that the back doesn’t arch.

Pillow Squeeze
Usual starting position, except that the feet are together. Place a cushion between your knees. Breathe, zip and hollow. As you breathe out, squeeze the cushion between your knees, leaving the rest of the body relaxed and neutral, only squeezing with the knees. Continue to breathe normally, squeezing the cushion for up to ten seconds at a time. Release. Repeat. This is absolutely amazing for working the pelvic floor and deep abdominal muscles: it really seems to help hold everything together in the abdomen!

Spine Curls
The aim of this exercise is to ‘unlock’ the vertebrae of the spine, thereby improving general flexibility and stability. It is particularly useful to those of us who have been lying down, or sitting, for too long. Also, I think that, when we are anxious about the pouch, we often tension the spine, rather than the abdominal muscles, thereby making things worse! Start in the usual Relaxation Position, with feet hip-width apart, parallel and firmly planted on the floor. Breathe, zip, hollow, then gently curl the base of your spine, your tailbone, slightly off the floor. Keep breathing, zipping and hollowing, as you curl back down. With each repetition, curl a little more of the spine off the floor, until eventually the spine is fully lifted, as in the picture. The idea is that we should be trying to move each vertebra separately, one at a time, as we curl up and down. Think of this particularly as you curl back down: go very slowly, like an old-fashioned film, one frame at a time. It is very hard to achieve this but, with practice, you will find that more vertebrae manage to move on their own. It’s fine just to concentrate on moving the bottom few, which matter most to us.

Curl Up
I admit at once that this is the one exercise I hate – and never seem to get much better at! I think this is because I’ve had so much abdominal surgery that the relevant muscles are, so to speak, ‘disadvantaged’: you may find the same is true for you. Other people in my Pilates class, however, also find this difficult, so I don’t think we should worry about it – and any small improvement we can effect must be good! You had probably better avoid this, however, if you have any neck problems. Usual starting position. Put your hands behind your head, interlocking your fingers in the crook of your neck. Your elbows should be slightly forward, so they are just in your sight-line. Breathe, zip, hollow. Then tuck your chin in a little, imagining that you have a small piece of fruit, something like a tangerine, and that you have to hold it there, under your chin, without either dropping or squashing it. Then curl the upper part of your body forwards and upwards, again aiming for one vertebra at a time, then slowly return to the floor. Repeat, perhaps ten times. Note that you won’t be able to go very far at all: a couple of inches off the ground would be good! You will probably feel this in lots of abdominal muscles you didn’t even know you had – and you will be working them, even if you are hardly moving at all.

Roll Down
Finally, we need to get up off the floor and stand! This is another spinal exercise for flexibility and stability, in which the abdominal muscles help with the latter. Like the last two exercises, it aims at moving each vertebra separately. Stand with feet hip-width apart, in parallel and with your weight evenly distributed on both feet. Make sure you are balanced, with legs slightly bent. Breathe, zip and hollow, so that you are standing tall. Let your chin fall forwards, then let the weight of your head follow, taking your spine with it, one vertebra at a time. Roll as far as feels comfortable, until you rest, arms hanging, centre strong, knees soft, feet flat on the floor. This is one of the positions I like best of all: the lengthening of the spine seems to stretch out the abdominal cavity, realigning everything inside! Remember to breathe. Then, zipped and hollowed, start restacking the spine, moving the lowest vertebrae first, one by one, so that your head comes upright last. Repeat.
Up and Down on Toes
Another standing exercise, to improve stability and balance, with which strong core muscles help. You may want to hold on to a wall or piece of furniture, at the start. Breathe and stand tall. Then imagine you are a string puppet and someone is pulling you up from the top of your head. At the same time your tailbone is very heavy, keeping you anchored to the floor. Breathe out, zip, hollow and rise up on your toes. Breathe in. As you breathe out, slowly lower your heals back down to the floor. Then bend your knees directly over your feet, keeping your heels on the floor. Straighten up. Repeat, perhaps ten times..
Corkscrew
We are approaching the end of this little sequence of exercises now. This one I find particularly useful for eliminating any tension in the upper body which has been created by the last few! It is also good for balance and core stability. Standing again, breathe and lengthen the spine: think of that string puppet once more. Lift your arms gently upwards, without lifting the shoulder blades, and clasp your hands lightly behind your head. Breathe in as you shrug your shoulders up to your ears, then out as you drop them back down. Breathe in, then out as you release your hands, opening your arms wide, as you bring them back down to your sides, in the manner of a corkscrew. Repeat.

Diamond Press
Now we get down on the floor again, this time lying prone. This again promotes mobility in the upper back, while strengthening the upper abdominals. Lie on your front and create a diamond shape with your arms; palms downwards, fingers together. Rest your forehead on the backs of your hands. Breathe, then, on an out-breath, very slowly and gently, lift the head, then the neck, then the chest off the floor. The lower ribs should remain in contact with the floor, but the upper chest is open and faces forwards. Keep the neck in alignment with the spine. Breathe in and hold this lengthened position. Then, very slowly lower back down, from the lowest vertebrae first, to the head last. Repeat

Dart
This is a variant on the above, which brings the inner thighs into play, to help maintain core stability. The starting position is as above but with the arms by the side of the body, palms facing upwards. Legs are straight, close together and relaxed. Then, breathing, gently raise the head, neck and chest, as for Diamond Press. At the same time, lengthen and raise the arms a little, turning the palms in to face the body, and draw the legs together, so that you can feel a connection between the inner thighs. Return, as before. Repeat.

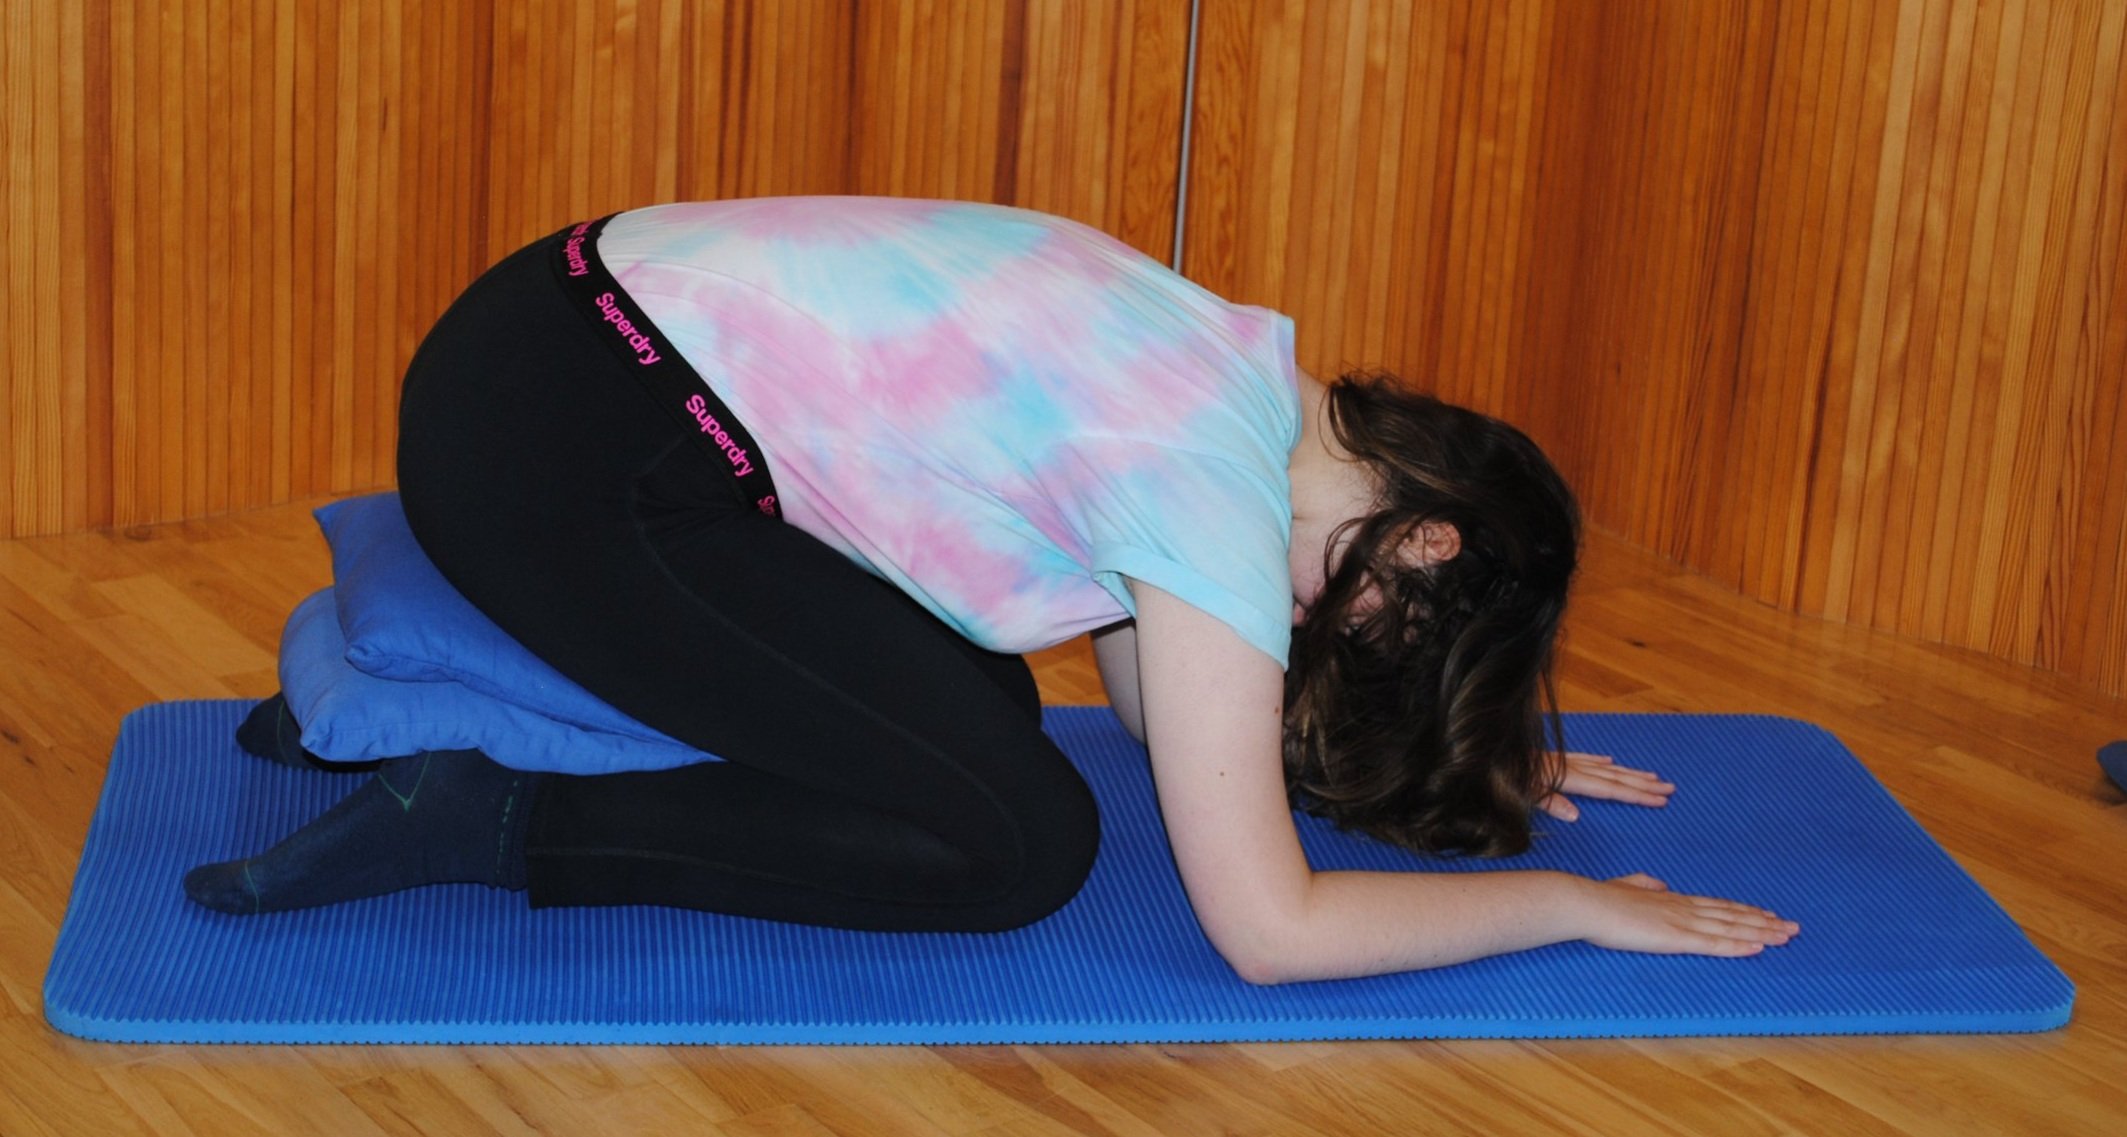
Cat
This is a good stretch to do at the end of a sequence of exercises. It promotes mobility and release through the whole length of the spine. Kneel on the floor, with hands down – and both knees and hands hip-distance apart. This is a very good position in which to feel core stability. Breathe. Slowly tuck your pelvis in, so that your lower back gradually rounds and flexes, then your upper back follows and your neck and head roll slightly forwards. You have now arched your back, just like a cat. Breathing into the lower back helps maintain this lengthened C-Curve. Breathing should be easier by now, too! Breathe out, as you gradually reverse this, pushing the tailbone away.
Rest Position
This is the end – and not really an exercise at all. From the position of Cat, above, bring the feet closer together, then slowly fold the hips and bring the bottom backwards and down, leaving the hands as close to where they were as possible, so that the upper body is lengthened. Fall as far into the floor as you can, concentrating on breathing and feeling the ribcage expand and contract. Your whole body should feel stabilised and calm. You may even, just for a moment, forget that you have a pouch, as I do, on the best days!